Clone the pre-configured Motion Character
To quickly get started with Motion, Motion ships with a pre-configured Motion Character that you can use to instantly playtest!
As Motion gets updated from time to time, this Motion Character may be modified by updates, so in this guide we will make a copy of it that remains mostly unaffected by updates to not interrupt your development.
Making a clone
To make a copy of the character that ships with Motion, we need to ensure that we are able to find it first!
To do so, open your Content Browser, press the "Settings" button in the top right of the content browser and enable Show Engine Content and Show Plugin Content by clicking on it.

Once done, you should be able to see all of Motion's contents on the left-hand side of the content browser.

Navigate to Plugins\MotionCore Content\Motion\Blueprints and locate the BP_MotionCharacter blueprint.
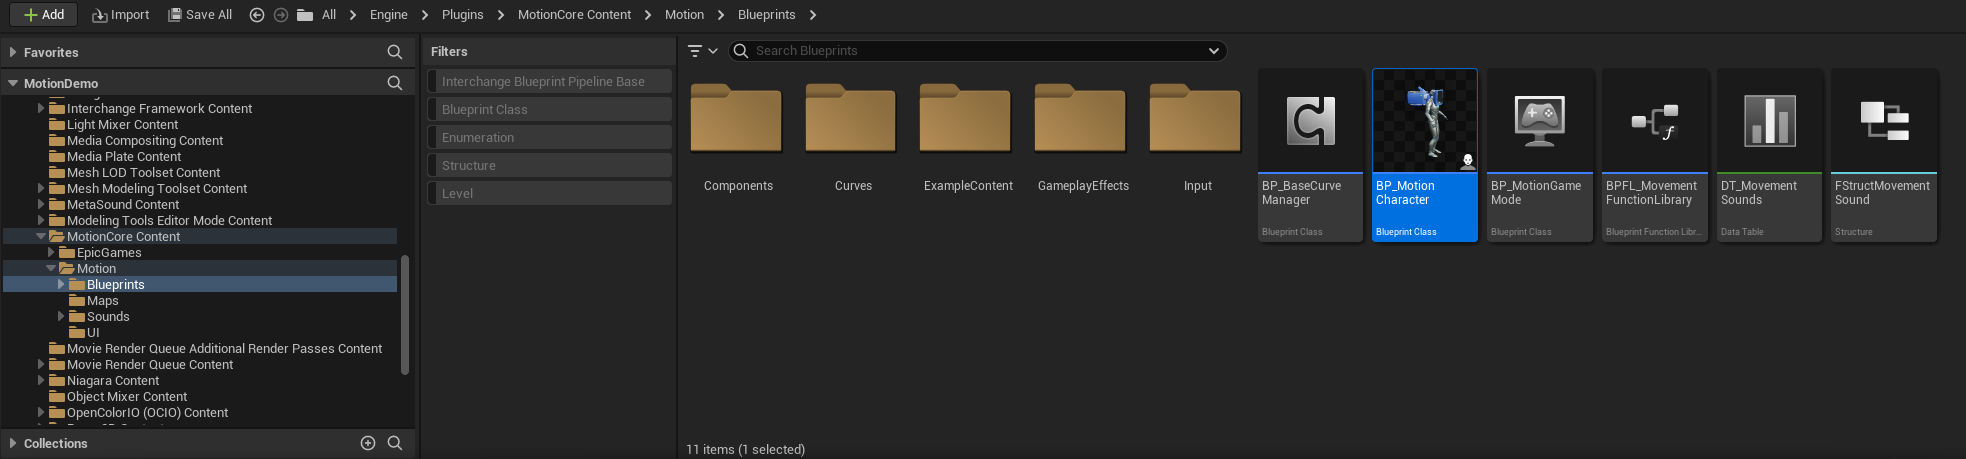
Click-and-hold the asset, and drag it towards the main Content folder of your project and select "Copy here".

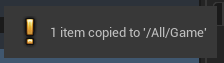
If successful, you will see a message like this:
Once copied, make sure to rename your copy of the blueprint so you can identify it when selecting it from drop-down menus. Right-click it and select "Rename". Then, give it a new name. I'll go with B_MyGameCharacter.

Creating a new GameMode
To ensure that our copy of the pre-configured Motion Character is used, and not the original, when we playtest we will now create a new GameMode.
Right-click in the content browser and select "Blueprint Class".

In the popup that appears, select "Game Mode Base" and a new GameMode asset will be created. Give it any name you'd like. I'll go with B_MyGameGameMode.

Open the new game mode by double-clicking it, and select "Class Defaults".

Then, in the details tab, go to the "Classes" section, and for the "Default Pawn Class", select your copy of the Motion Character (in my case B_MyGameCharacter).
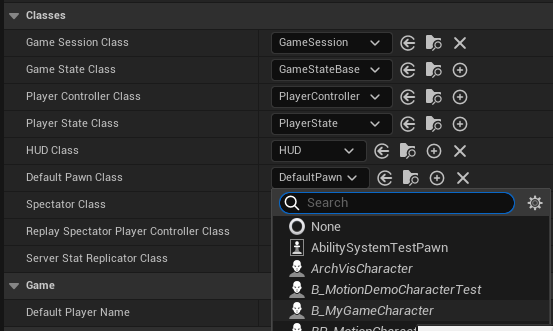
While you are in this screen, also update Player Controller Class to be MotionPlayerController.
Updating the project default game mode
Once our new game mode is ready to be used, we need to let Unreal Engine know that it should use it for our project.
To do so, open the "Project Settings" by clicking the "Settings" button in the top-right corner of the editor and select "Project Settings".

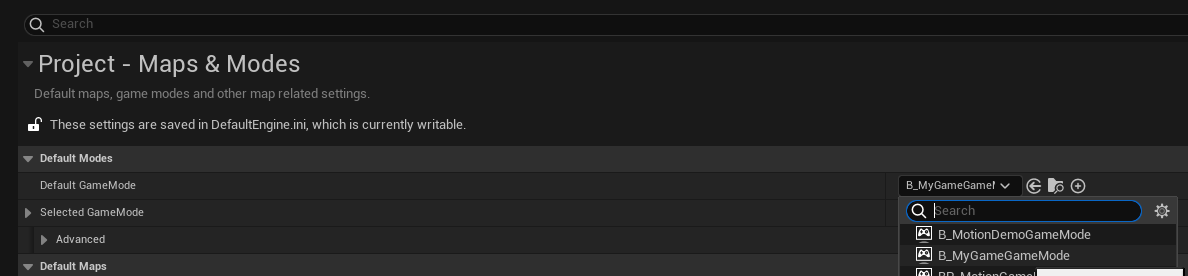
In there, select "Maps & Modes" from the left-hand side menu.

And there select your game mode in the "Default GameMode" dropdown menu.
Setting up Motion's Input Component
To make sure that all inputs work as intended, you need to switch the default input component class used in your project to the one that ships with Motion.
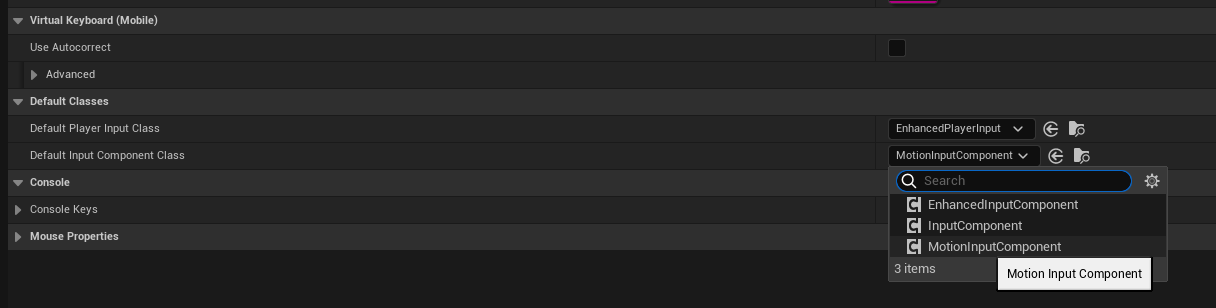
With the project settings still open, head to the "Input" settings.
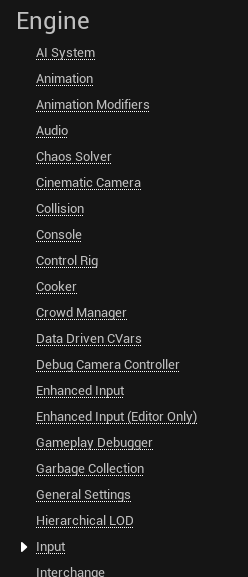
In there, all the way at the bottom, change the default input component class to MotionInputComponent.
Verifying your Results
You should be ready to roll now! You can test if your new character is selected by hitting the ![]() icon at the top of your screen or pressing
icon at the top of your screen or pressing ALT-P.
You should:
Last updated