# Creating a custom ability
This page explains how you can create your own gameplay ability based on the [Gameplay Ability System](https://dev.epicgames.com/documentation/en-us/unreal-engine/gameplay-ability-system-for-unreal-engine?application_version=5.0) (short "GAS") that comes pre-integrated with Motion.
### Creating the Gameplay Ability Blueprint
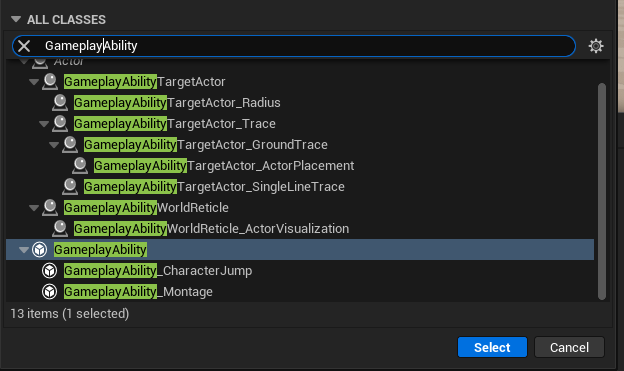
Let's start by implementing a simple Dash ability. To do so, create a new blueprint with the `Gameplay Ability` parent class.
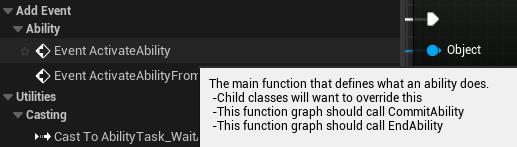
For the sake of this tutorial, we are only going to implement the `ActivateAbility` event, which gets called once you've triggered the input for the ability that we will set up later.
When searching for `ActivateAbility`, you will notice that it requires us to implement a `CommitAbility` call and a `EndAbility` call.
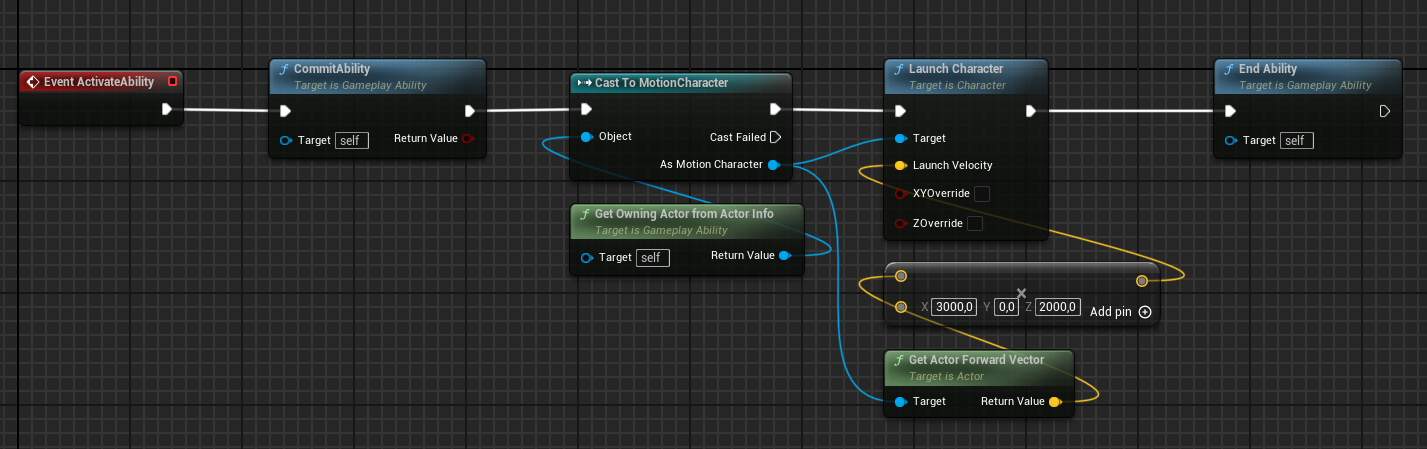
Before calling CommitAbility you will want to implement any custom checks that could result in the activation to fail. (i.e. check if there is a wall in the way)
You do **not** have to implement any checks for ability cost here yourself, as this will be handled by the `GameplayEffect` that you set in the `Class Defaults` under `Cost Gameplay Effect Class`.
For the sake of this tutorial, we will simply assume that dashing is always permitted and cannot fail. Our code should look like this:
Now that our ability has some logic behind it, we need to ensure that it can actually be called. To do that, open the `Class Defaults` at the top of the editor window's toolbar, and add a new entry in the `Ability Triggers` array.
In that array element there are two properties:
1. Trigger Tag: The gameplay tag to respond to.
2. Trigger Type: The type of trigger to respond to.
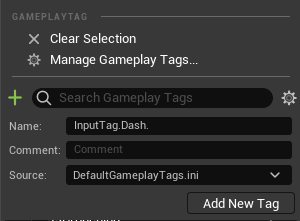
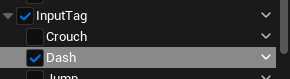
Create a new trigger tag by clicking into the textbox and press the green "+" icon. Type in "InputTag.Dash".
Once it's created, make sure to select it by clicking its checkbox.
### Setting up the input for the ability
Once our `GameplayAbility` has been fully implemented, we can now add it to our `MotionCharacter`.
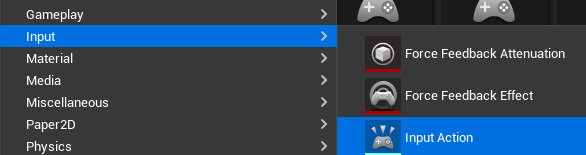
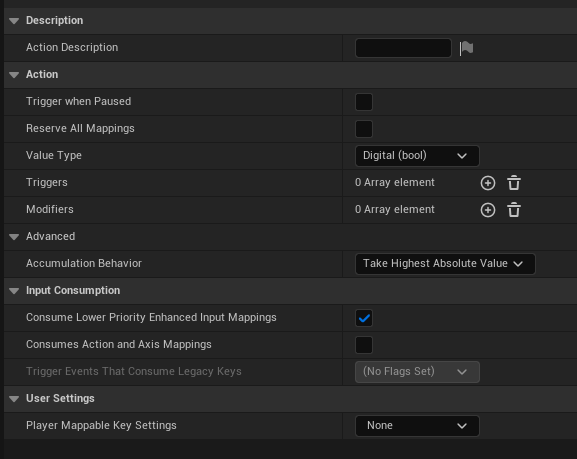
In a folder of your choosing, create a new `Input Action`.
You can leave the options as they come by default.
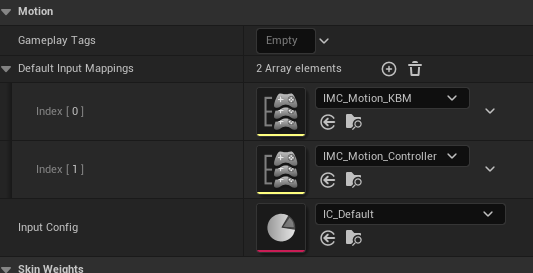
To assign the Input Action an input key, open your Input Mapping Context (Default is `Plugins/MotionCore/Content/Motion/Blueprints/Input/IMC_Motion_KBM` ) and add to the Mappings array.
{% hint style="warning" %}
The default MotionCharacter that ships with Motion references the Input Mapping Context that ships with the plugin. To avoid your changes being overwritten by future updates of Motion, you should make a copy of the Input Mapping Context, place it in your project folder, and reference that in the character blueprint.
You can change the reference in the Class Defaults of your character blueprint under the "Motion" category.
{% endhint %}
Once you've done that it is time to assign the Input Action an Input Tag, so the GAS can associate the input with the ability.
Open your `MotionInputConfig` (Default: `Plugins/MotionCore/Content/Motion/Blueprints/Input/IC_Default` ) and add your ability under the `Tagged Ability Actions` array.
{% hint style="warning" %}
Above warning regarding making a copy to avoid updates overwriting your changes also applies to the `MotionInputConfig`!
{% endhint %}
Once done, save the asset. Double-check that your `MotionCharacter` is referencing the correct Input actions and start a PIE session. Your ability should be able to dash now pressing `G`.
For more information about setting up gameplay abliities, please refer to the above mentioned documentation and check out tranek's great GAS documentation [here](https://github.com/tranek/GASDocumentation).

 {% endhint %}
Once you've done that it is time to assign the Input Action an Input Tag, so the GAS can associate the input with the ability.
Open your `MotionInputConfig` (Default: `Plugins/MotionCore/Content/Motion/Blueprints/Input/IC_Default` ) and add your ability under the `Tagged Ability Actions` array.
{% endhint %}
Once you've done that it is time to assign the Input Action an Input Tag, so the GAS can associate the input with the ability.
Open your `MotionInputConfig` (Default: `Plugins/MotionCore/Content/Motion/Blueprints/Input/IC_Default` ) and add your ability under the `Tagged Ability Actions` array.
